Excel is a powerful tool that allows users to create and manipulate data in various ways. One common task that users may want to perform is centering their worksheet horizontally on the page. This can help make the data more visually appealing and easier to read. In this article, we will discuss how to center a worksheet horizontally in Excel.
To center a worksheet horizontally in Excel, follow these simple steps:
1. Select the entire worksheet by clicking the square in the top left corner of the worksheet, between the row numbers and column letters.
2. Go to the Page Layout tab on the Excel ribbon at the top of the screen.
3. Click on the “Page Setup” group, then click on the “Margins” dropdown menu.
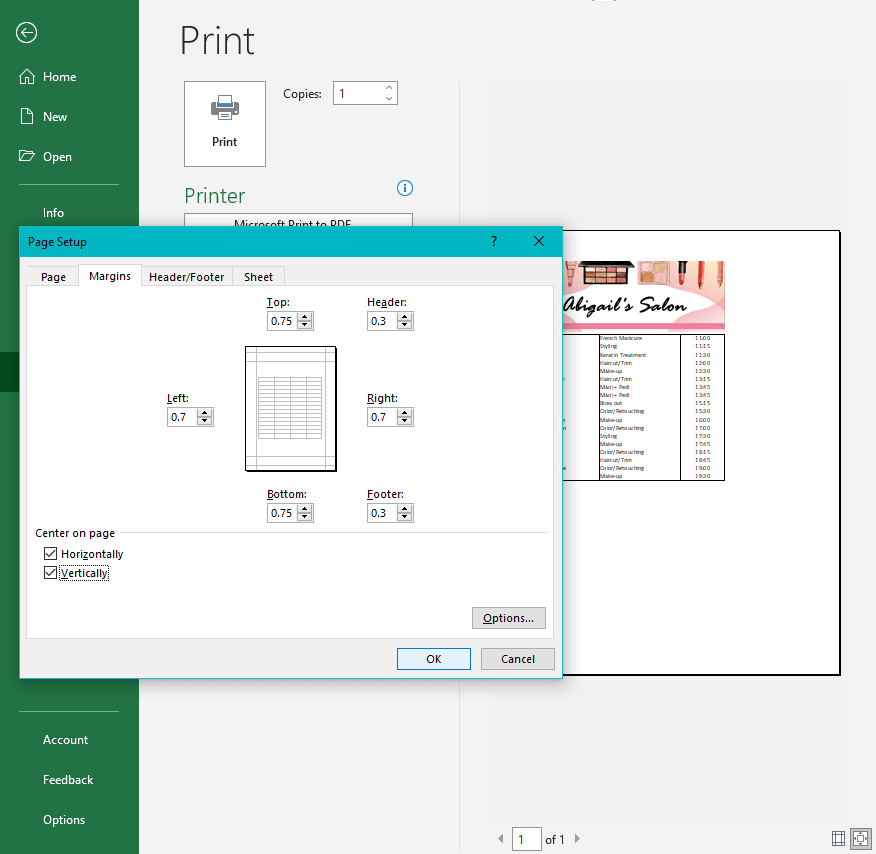
4. Select “Custom Margins” from the dropdown menu.
5. In the Page Setup dialog box, go to the Margins tab.
6. Under the Center on Page section, check the box next to “Horizontally.”
7. Click OK to apply the changes and center the worksheet horizontally on the page.
Following these steps will ensure that your worksheet is centered horizontally on the page, making it easier to read and work with.
By centering your worksheet horizontally in Excel, you can improve the overall appearance of your data and make it more visually appealing. This simple trick can help make your worksheets look more professional and organized, enhancing the overall user experience.
In conclusion, centering a worksheet horizontally in Excel is a quick and easy way to improve the appearance of your data. By following the steps outlined in this article, you can ensure that your worksheet is centered on the page, making it easier to read and work with. Try centering your worksheet today and see the difference it can make!
